How to Remove Blank Rows in Excel – ADVANCED
As promised, this video tutorial will go through how to remove blank rows in Excel and make sure no data is lost whatsoever! And even though it’s advanced, it won’t give you much headache.
See the video tutorial and transcription below:
See this video on YouTube:
https://www.youtube.com/watch?v=0a4TgCVbX_k
The previous video covered a general way that described how to remove blank rows in Excel.
But we can’t use it at all times. That quick way is safe only when all the rows you wanna delete are completely blank, so there are no data to lose.
The problem is if one or more rows contain not only blank cells, but also cells that store some information.
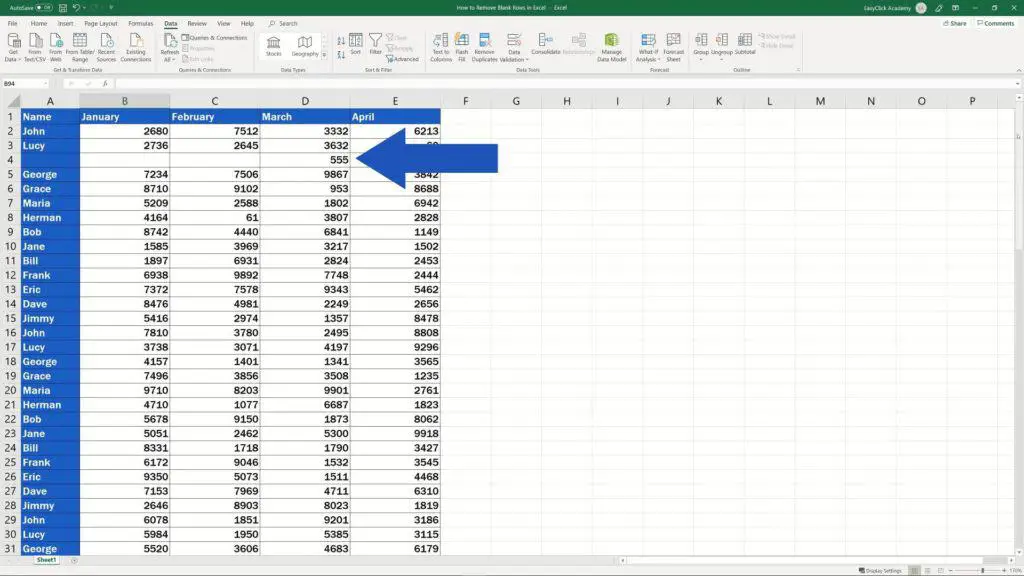
Remember the table from the previous tutorial? Row 5, specifically cell D5, contained the number 555. Let’s say that the information is very important and we can’t afford to lose it.
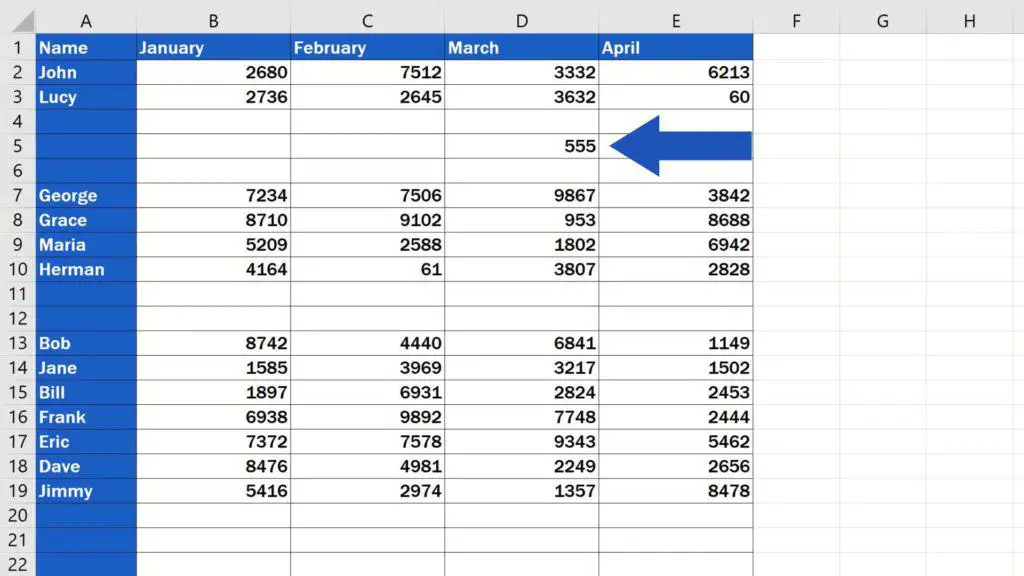
But this is what would happen if we did remove blank rows the way we saw in the previous tutorial. Find the blank cells and delete the highlighted rows and you see that our important figure has also been deleted.
Let’s undo the change now and see how we can solve the task without losing the data.
The Advanced Way How to Remove Blank Rows in Excel
The advanced way we’re talking about uses the filter option. We’ll guide you through it step by step.
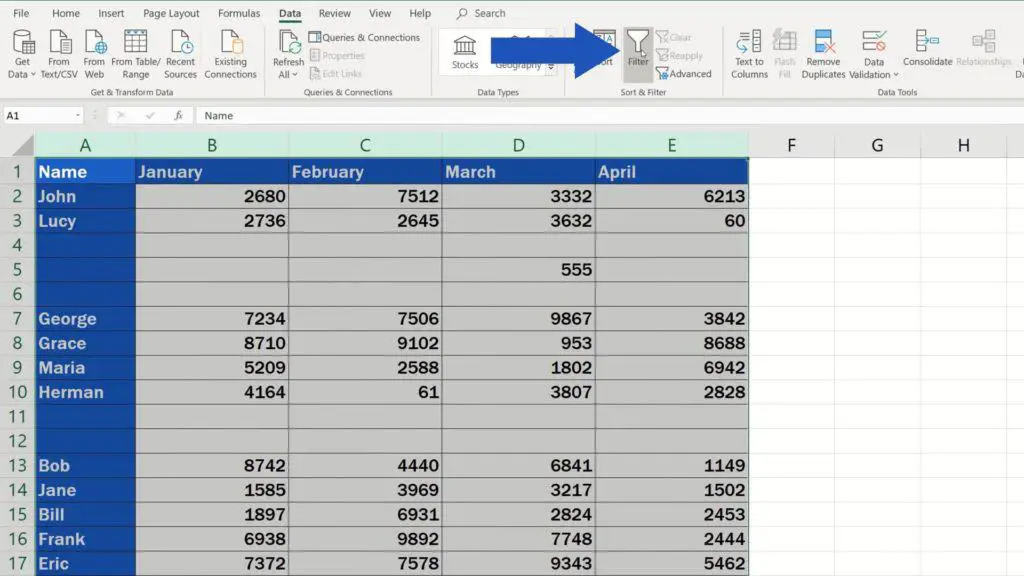
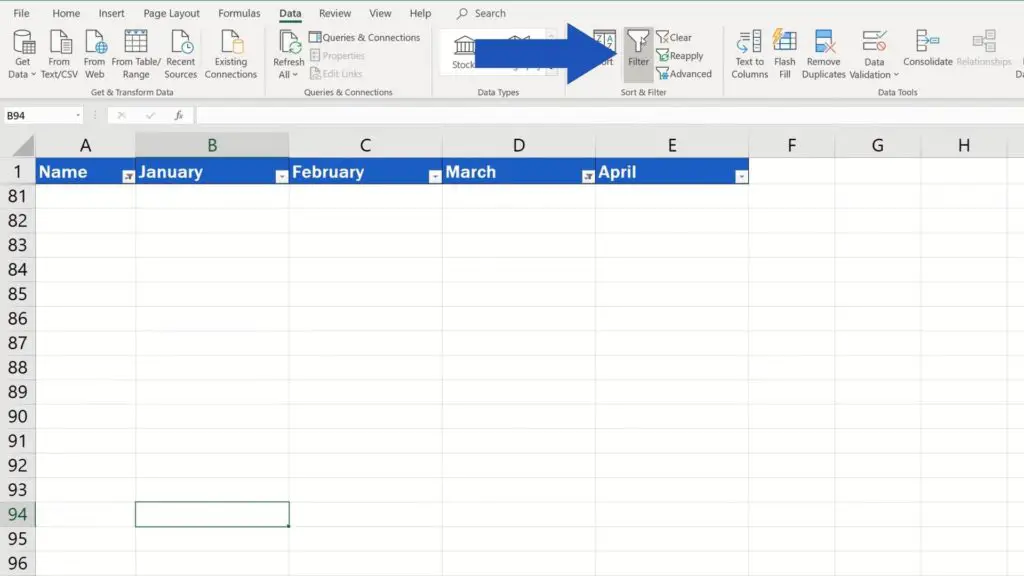
First, we need to add a filter to the table. Select the columns you want to filter through. Keep in mind, though, that you must select the whole columns. If you select just the column headers, the filter won’t work properly.
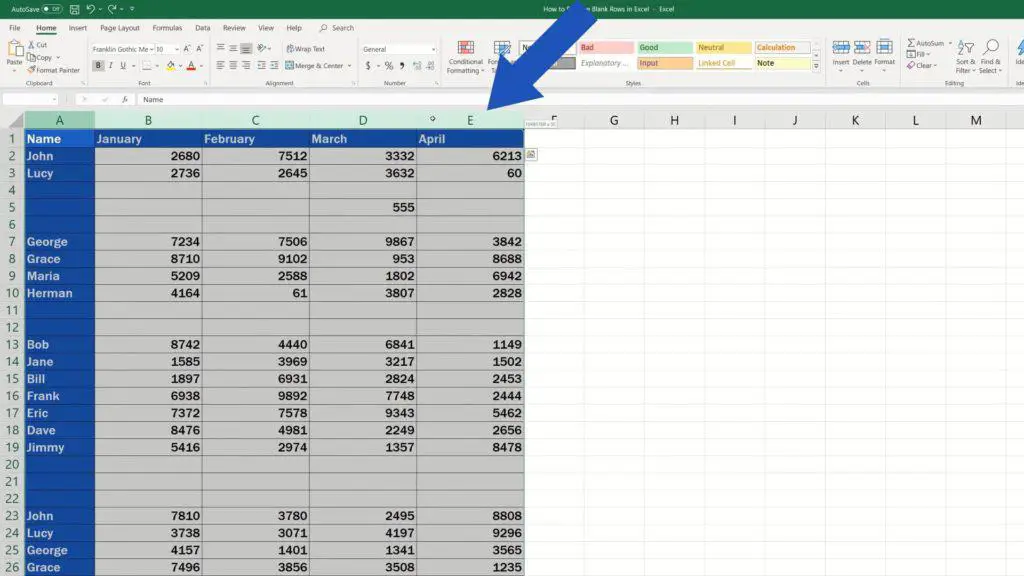
Once the columns have been selected, click on ‘Data’ tab, look for ‘Sort & Filter’ and click on ‘Filter’.
Buttons with an arrow appear and you’re ready to filter out what you need, in this case all blank cells, column by column.
We’re gonna have a look at it together, now.
Start with the first column. Click on the button and untick ‘Select All’.
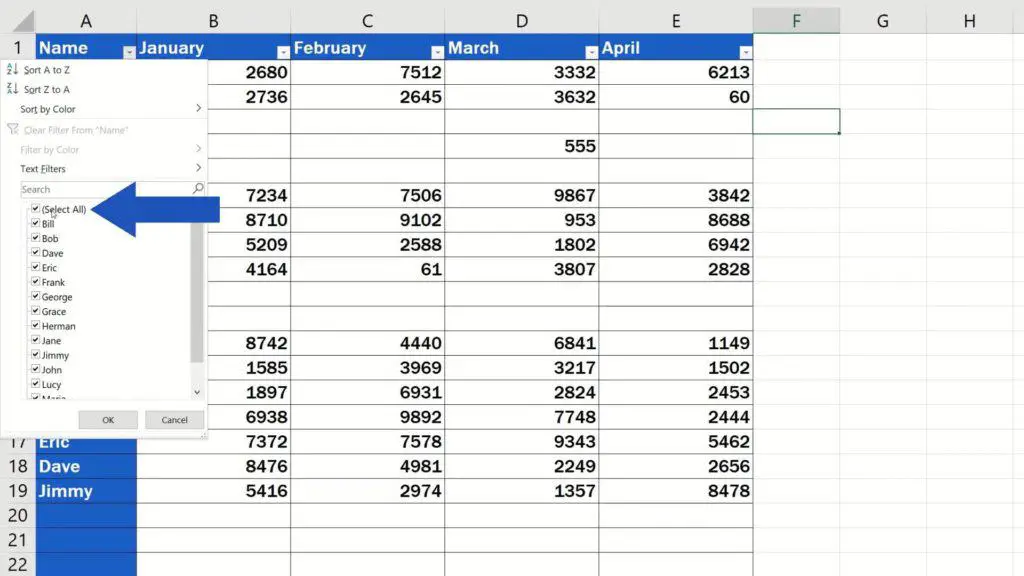
Then select ‘Blanks’ to filter out only the blank cells in this column. Click on OK.
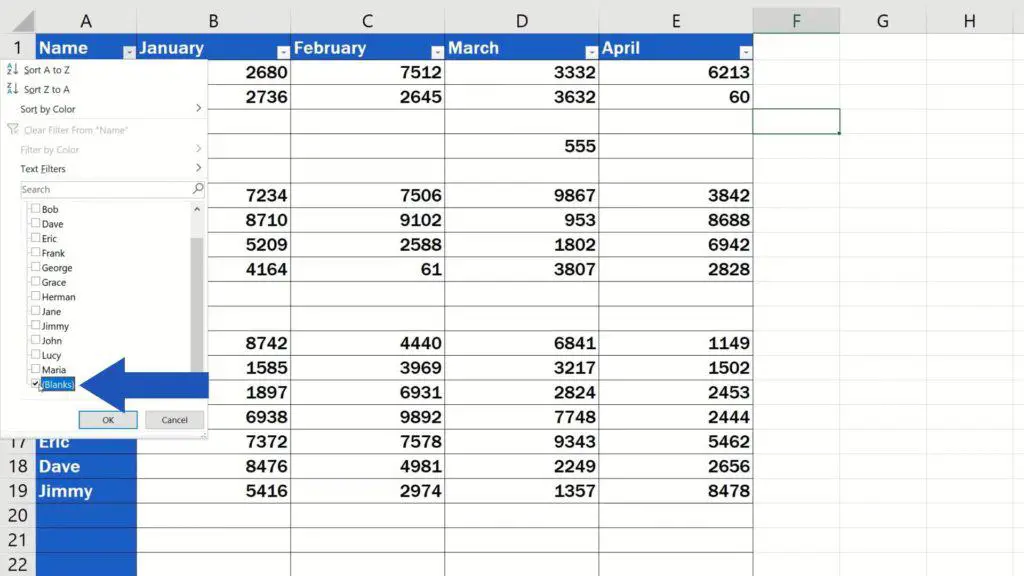
We’re starting to filter out blank rows which we’re gonna delete in a while.
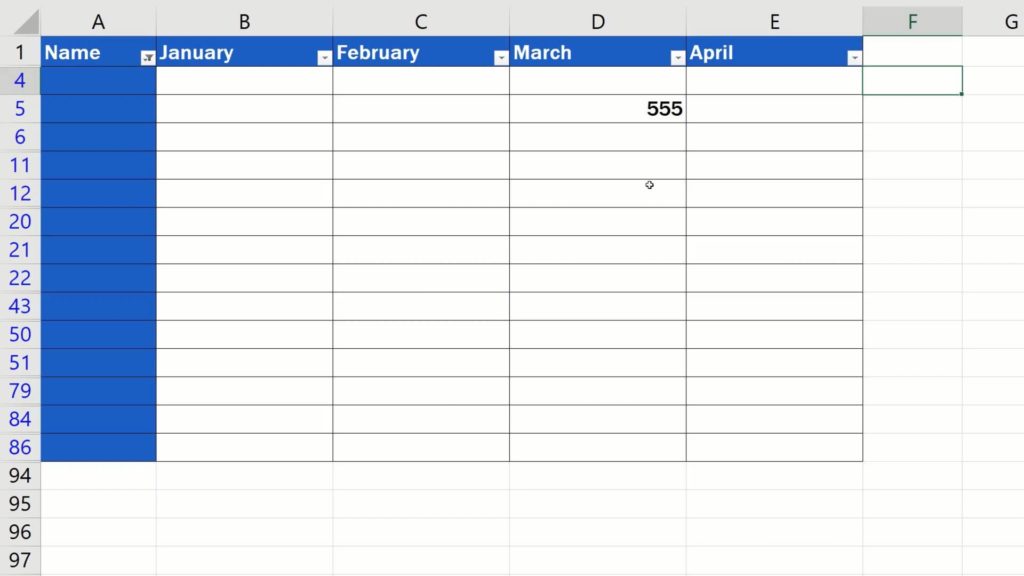
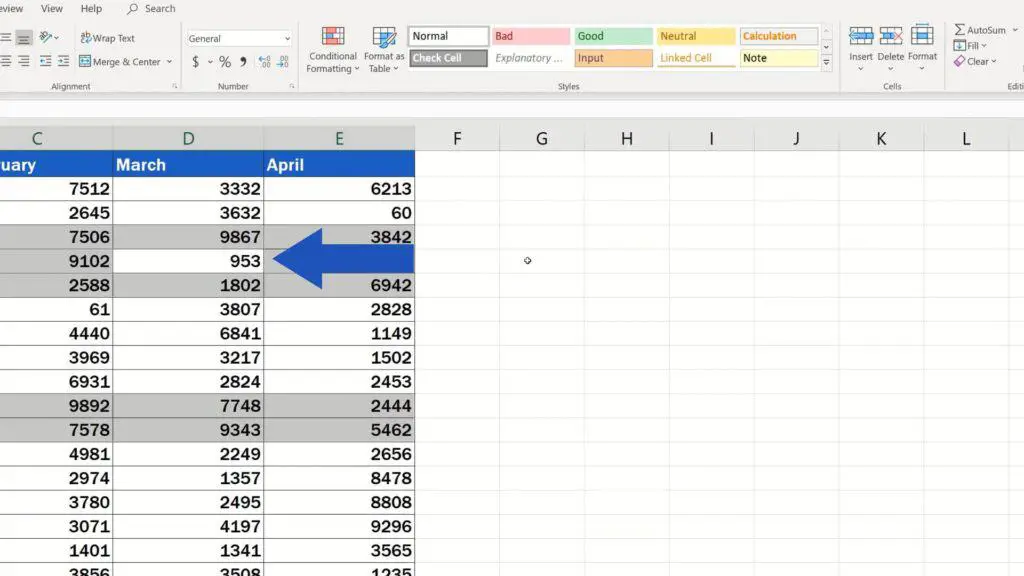
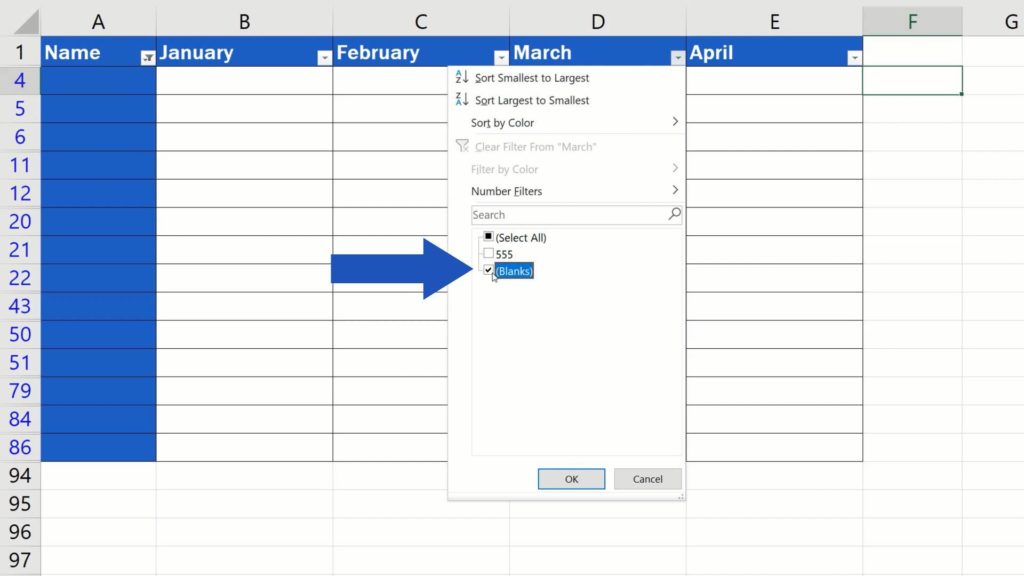
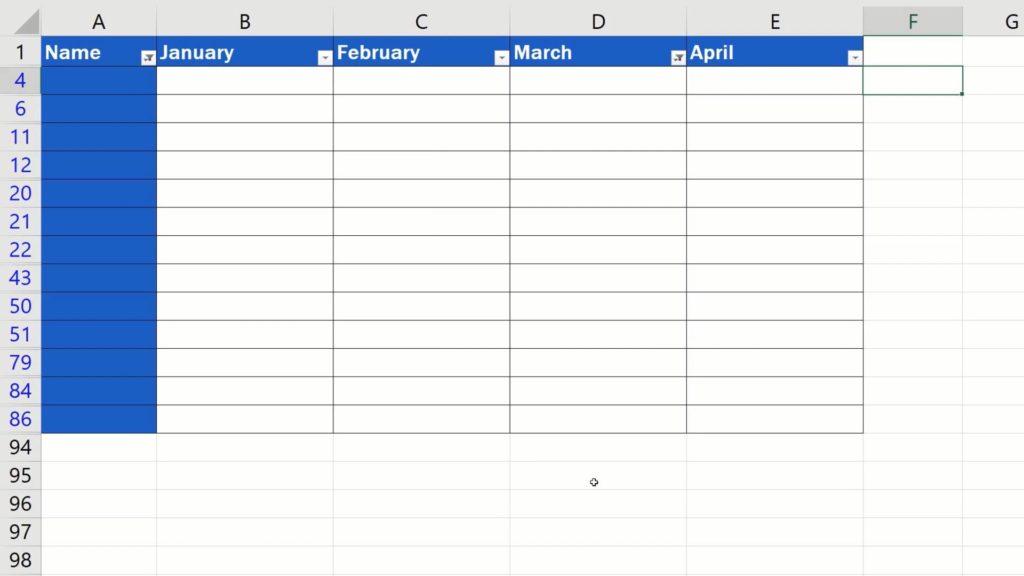
It is now obvious that the cell D5 contains some data which we want to keep. So, we’ll use the filter in row D, too, and we’ll do it the same way as we did a while ago – we’ll filter out only the blank cells.
Well, there you go! You can use this way to filter through the columns safely, so that only the rows that contain no values are visible eventually.
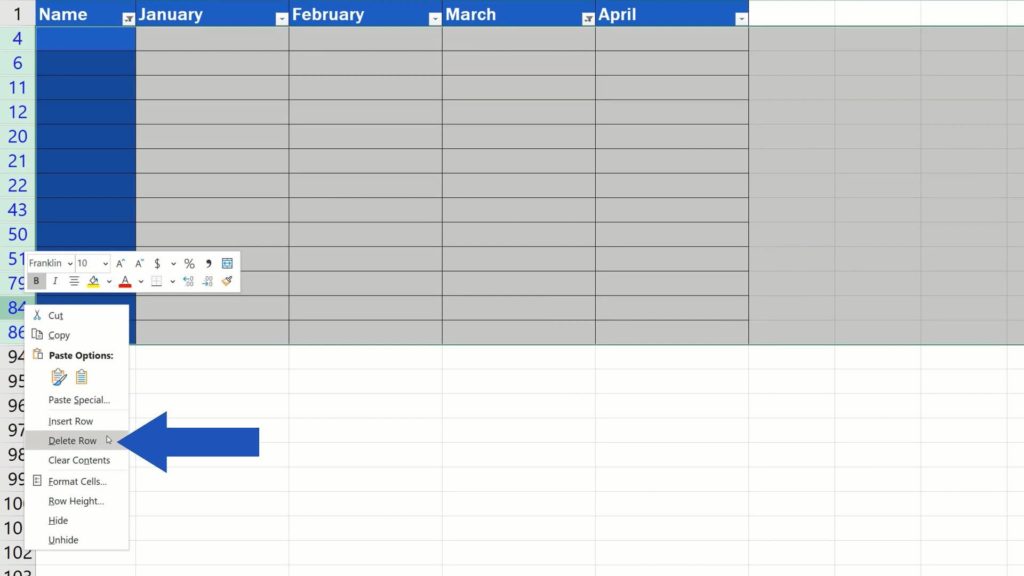
How to Remove Filtered Rows
And now we can delete these rows that we filtered out.
Highlight them, right-click, select ‘Delete Row’ and the blank rows have been removed!
How to Display the Previous Hidden Rows
All you need to do now is turn the filter off, so go to ‘Data’ tab and click on the ‘Filter’ button again.
The table displays the previously hidden rows. All the blank ones have been removed, but the partially filled row with the important data is still there!
Don’t miss out a great opportunity to learn:
- How to Remove Blank Rows in Excel – BASIC
- How to Delete Row in Excel
- How to Create Filter in Excel
- How to Clear or Remove Filter in Excel
If you found this tutorial helpful, give us a like and watch other video tutorials by EasyClick Academy. Learn how to use Excel in a quick and easy way!
Is this your first time on EasyClick? We’ll be more than happy to welcome you in our online community. Hit that Subscribe button and join the EasyClickers!
Thanks for watching and I’ll see you in the next tutorial!

 How to Subtract a Percentage in Excel
Welcome! Today we’re going to talk about the simplest way how to…


