How to Remove Blank Rows in Excel – BASIC
In this tutorial, we’re gonna have a look at how to remove blank rows from a table of any size in a couple of seconds. This way, you’ll make the spreadsheet look neat and data in it organized.
Ready to start?
See the video tutorial and transcription below:
See this video on YouTube:
https://www.youtube.com/watch?v=Ik7LRq7-COU
It’s very easy to delete rows one by one, which you could see in the previous tutorial on how to delete rows in Excel. However, that works best if there are just a couple of rows to remove.
Now, we’ll have a look at how to delete a bigger number of blank rows from a large table easily. And not only that. You’ll also learn how to handle a common but unexpected difficulty which happens when you’re trying to delete multiple rows. Keep watching – you won’t find this lifehack in other YouTube tutorials.
So, let’s start from the beginning.
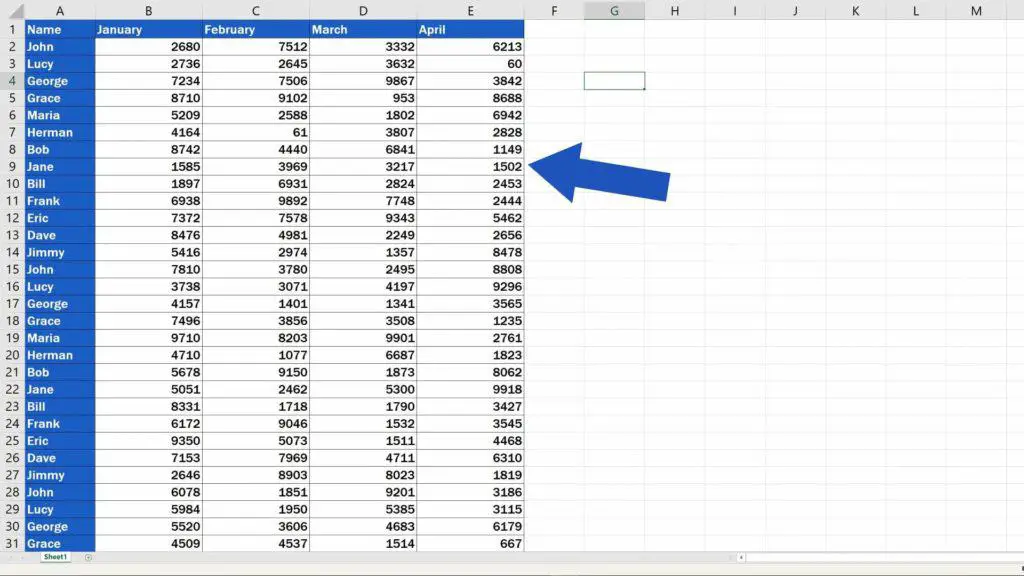
How to Remove a Bigger Number of Blank Rows from a Large Table
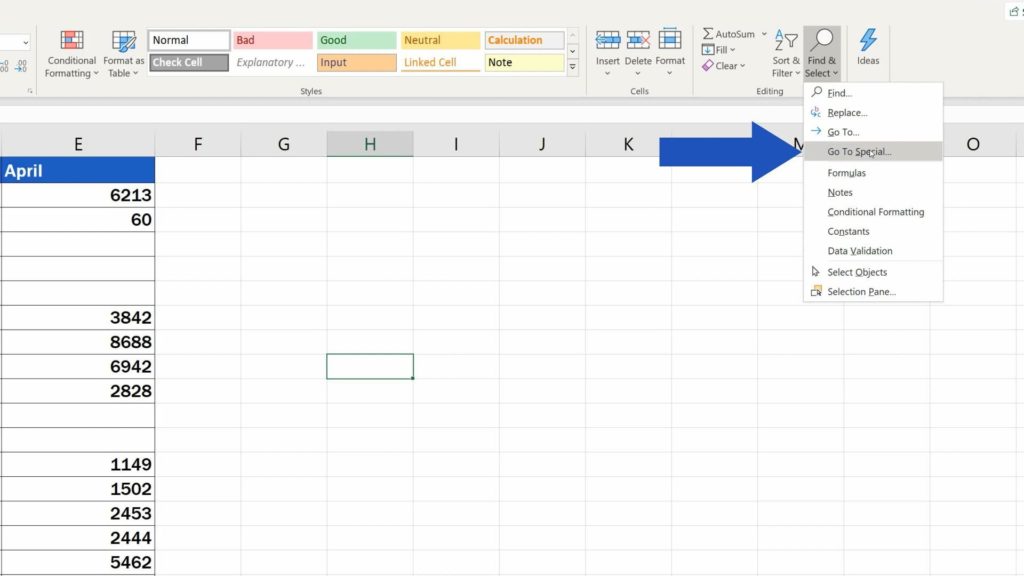
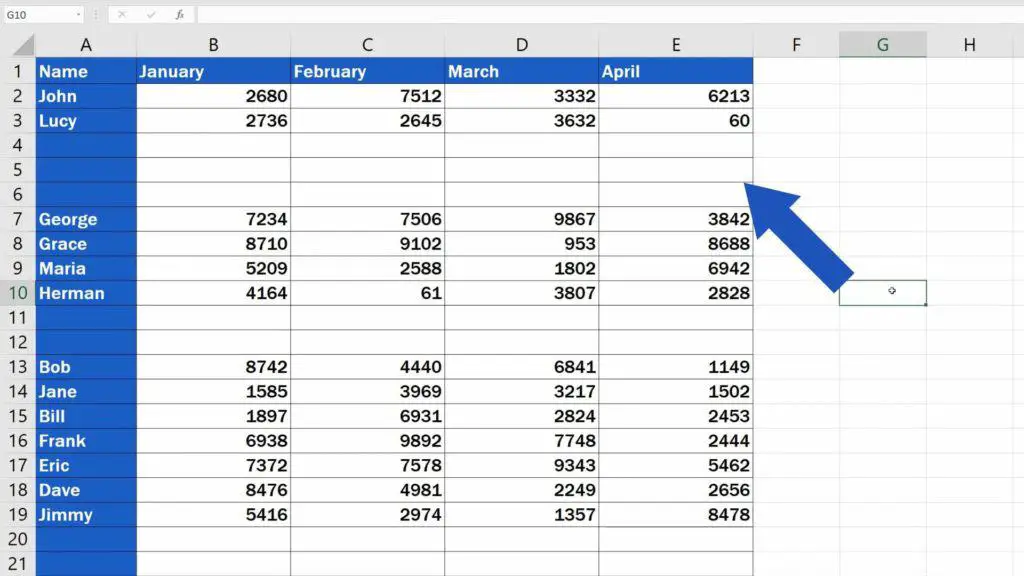
If you want to remove the blank rows in a table, go to ‘Home’ tab, group ‘Editing’ and click on ‘Find & Select’. Click on ‘Go To Special’.
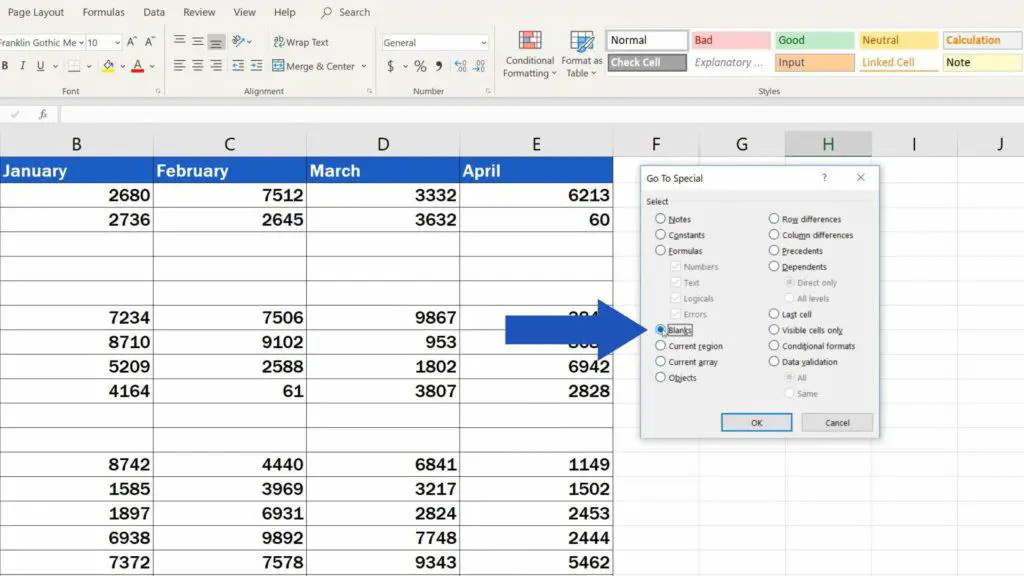
From the options available, choose ‘Blanks’ and confirm with OK.
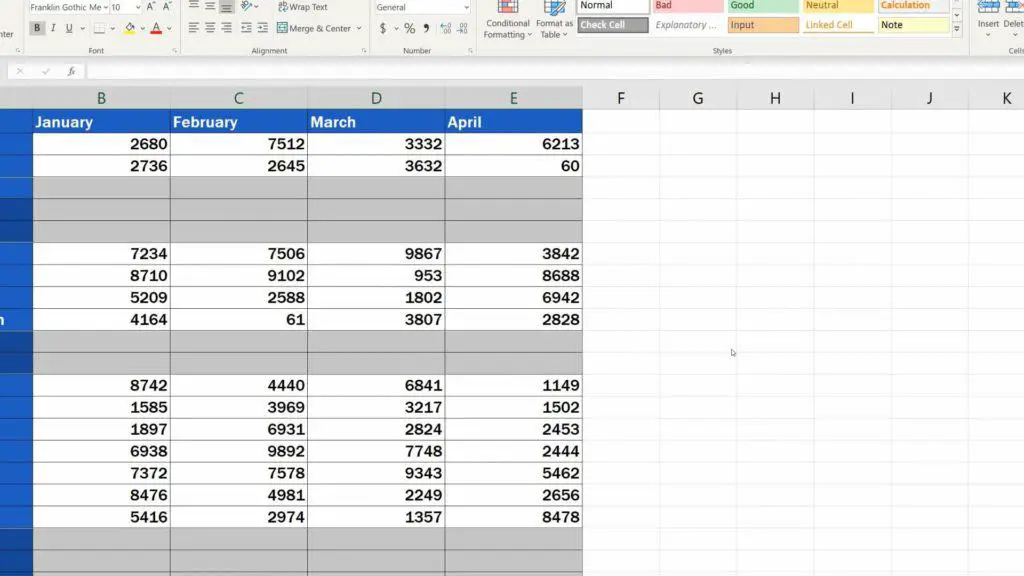
Every blank row in the table will get highlighted.
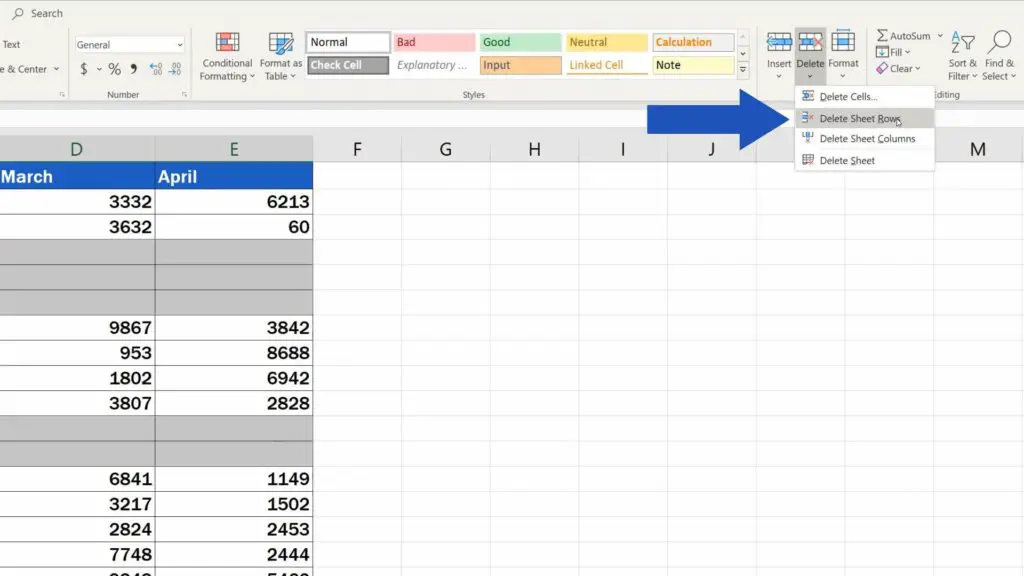
All you need to do now is to click on the option ‘Delete’ in the ‘Home’ tab, section ‘Cells’, and choose ‘Delete Sheet Rows’.
Good job!
The whole table has been immediately cleared from the blank rows.
But watch out!
How to Fix the Common Problem while Deleting Multiple Blank Rows
Here’s the big problem you might encounter while deleting multiple blank rows from a table and other YouTube tutorials won’t tell you about it.
Undo the changes and we’ll show you what can go wrong.
Those quick steps you learned a short while ago are okay to use then and only then, when all the rows you’re planning to delete are completely empty, which means none of the cells in these rows contain any data.
If there were both blank and filled cells in a row to be deleted, you could easily lose these data.
We’re gonna show you now, what actually happens with these partially filled rows.
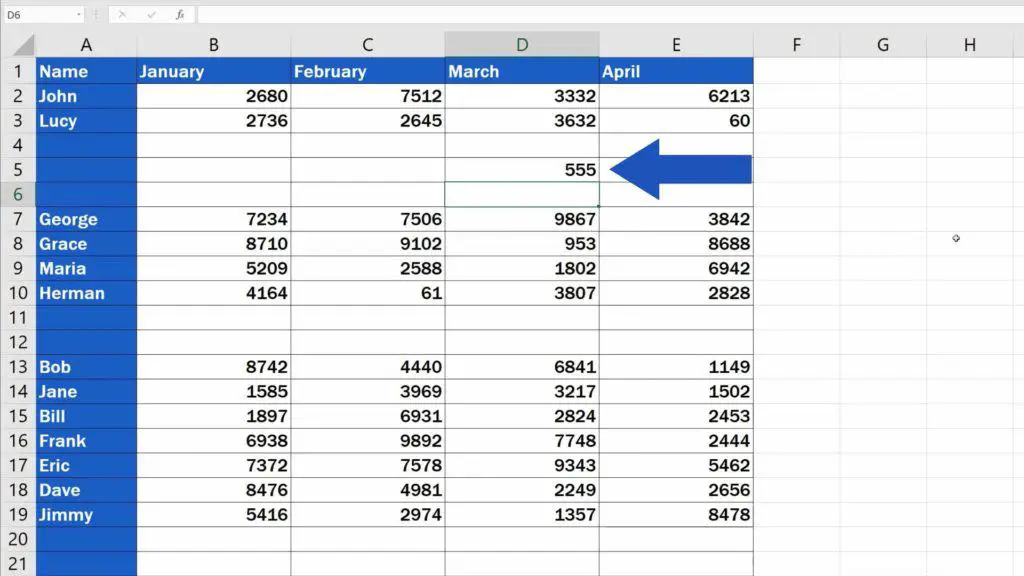
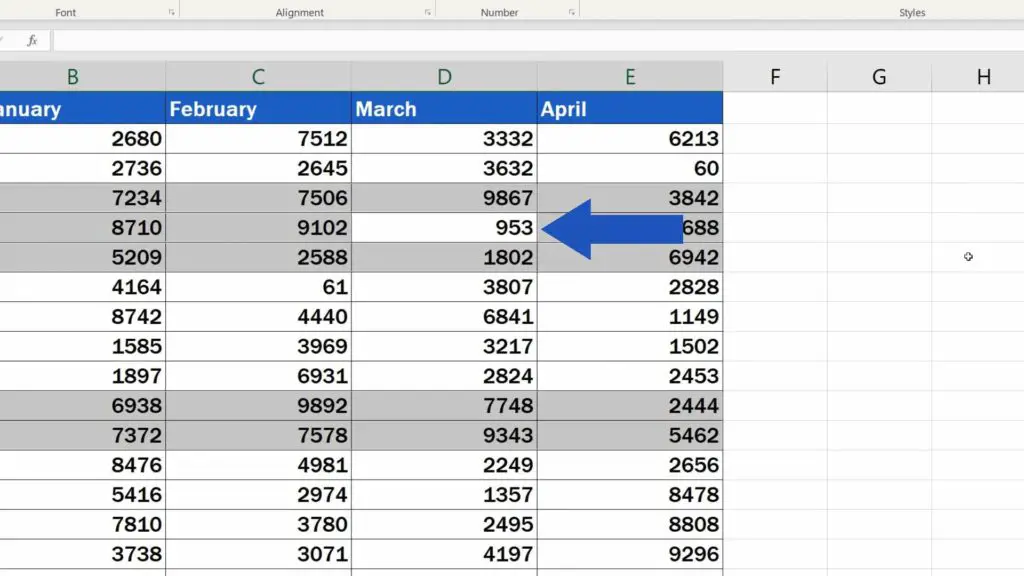
Let’s write figure 555 into the cell D5. Row 5 now consists of mostly blank cells, but also a cell that contains a value.
If we now follow the steps we saw previously, Excel deletes the row 5, because it detects some blank cells in it.
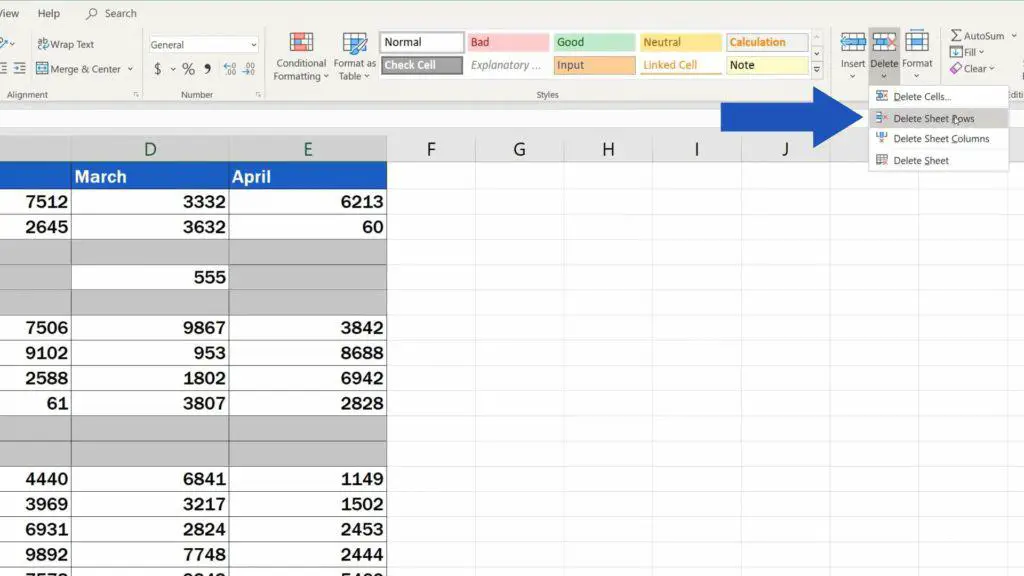
So, our number 555 has been lost.
If your data table contains such partially filled rows, watch our advanced tutorial that will show you how to handle a situation like this and not to lose important data when deleting rows in Excel.
Don’t miss out a great opportunity to learn more:
- How to Remove Blank Rows in Excel – ADVANCED
- How to Delete Row in Excel
- How to Create Filter in Excel
- How to Clear or Remove Filter in Excel
If you found this tutorial helpful, give us a like and watch other video tutorials by EasyClick Academy. Learn how to use Excel in a quick and easy way!
Is this your first time on EasyClick? We’ll be more than happy to welcome you in our online community. Hit that Subscribe button and join the EasyClickers!
Thanks for watching and I’ll see you in the next tutorial!

 How to Subtract a Percentage in Excel
Welcome! Today we’re going to talk about the simplest way how to…


