How to Separate Names in Excel
Today’s tutorial will guide you through several simple steps to see how to separate names in Excel no matter the size of the table you’re working with.
Here we go!
See the video tutorial and transcription below:
See this video on YouTube:
https://www.youtube.com/watch?v=J1ccouJGB5k
Last time, you could see how to combine names or merge any type of information contained in multiple cells into a single one.
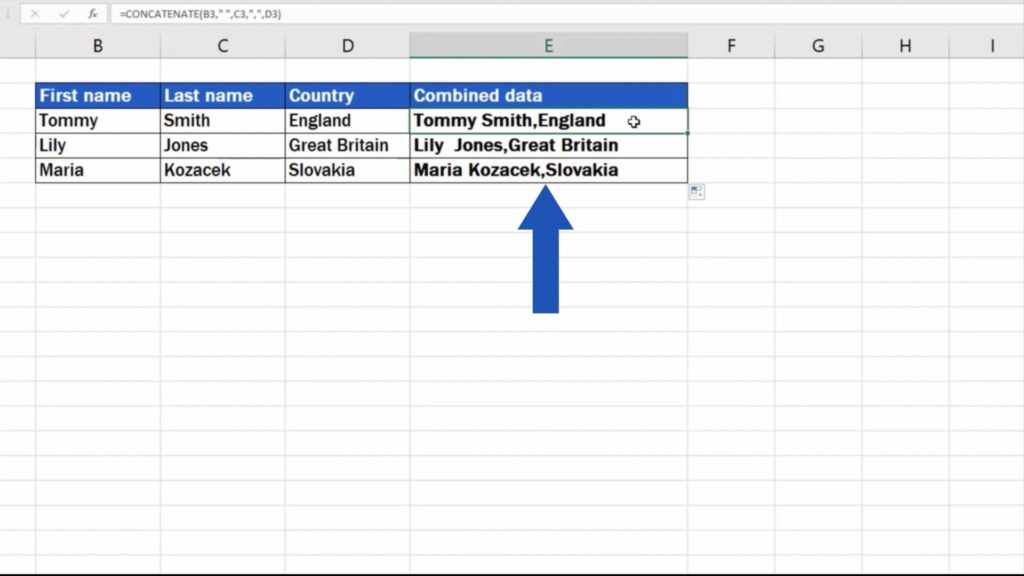
Now we’ll have a look at the same thing but in reverse – we’ll learn how to easily separate information included in one cell into multiple cells.
This data table here will serve as an example,
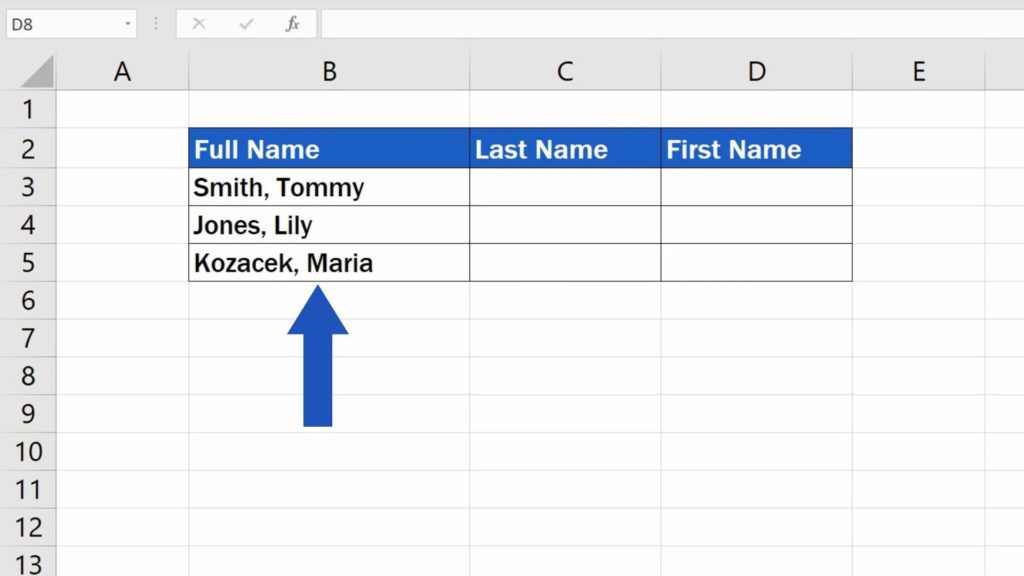
and we’ll cover how to separate the full name that appears within a single cell into two cells, which means we’ll get a separate first and family (or last) name of an employee.

So, what to do to carry out the task in the simplest way possible and avoid manual typing?
The Simplest Way How to Separate Names in Excel
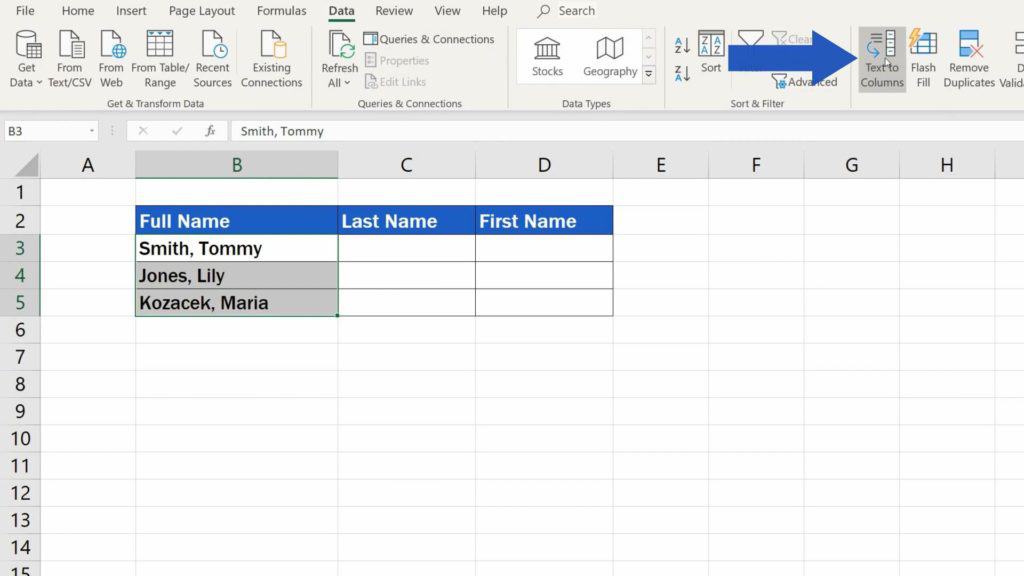
As usual, in the beginning, you’ll need to select the data you want to separate. Then click on ‘Data’ tab, go to ‘Data Tools’ and choose the function ‘Text to Columns’.
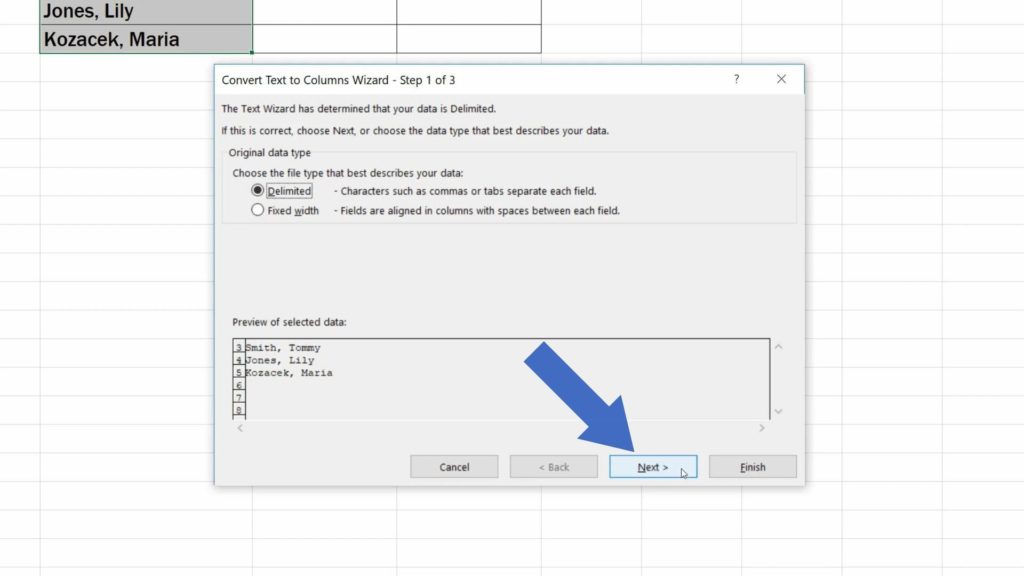
Now you’ll see a pop-up window. In most cases, you’ll be good to go with the first option in the window, the option ‘Delimited’. You can use it if you’re working with a table where items are separated with a comma or space.

Click on ‘Next’ and we’ll move on.
The following screen will show us a list of characters which delimit the names in the table. Our delimiter is a comma along with a space, so we’ll tick these two options.
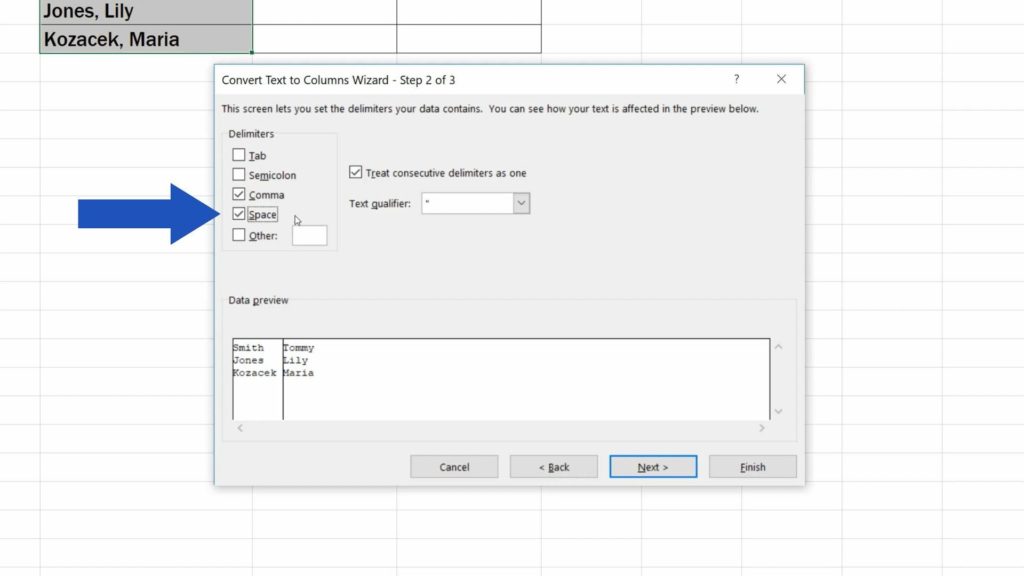
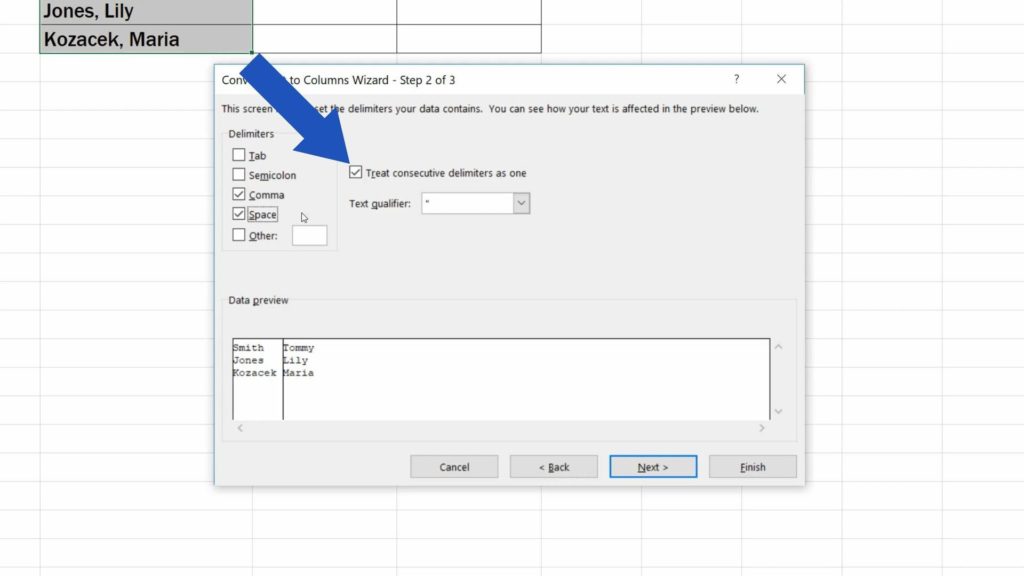
If there are more than one delimiter, like in our case where we have two, the comma and the space, tick the box ‘Treat consecutive delimiters as one’.
With the box left unselected, the result would appear as it shows here, in the panel at the bottom of the window.
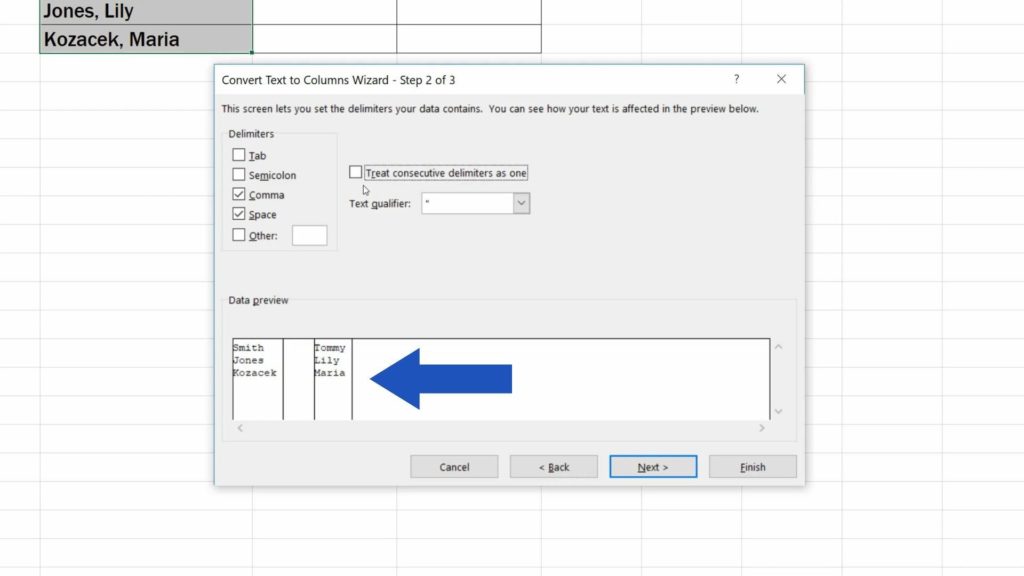
Set the design of the final look according to what you need, and let’s carry on.
On the last screen, you can adjust formatting, which we’ll keep set to ‘General’ now.
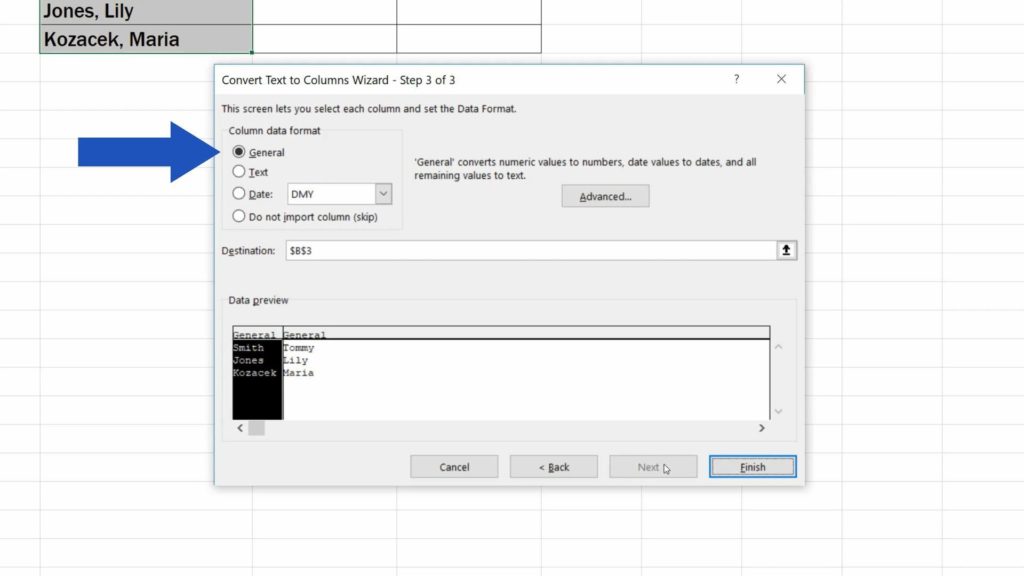
And we can move on.
How to Specify the Location Where Excel Should Place the Separated Names
The last but very important thing is to set the destination. Here you specify the location where Excel should place the separated names.
If you don’t change anything about the default value in ‘Destination’, Excel will be placing the separated names starting in the cell B3. That would overwrite the original information and we’d lose it.
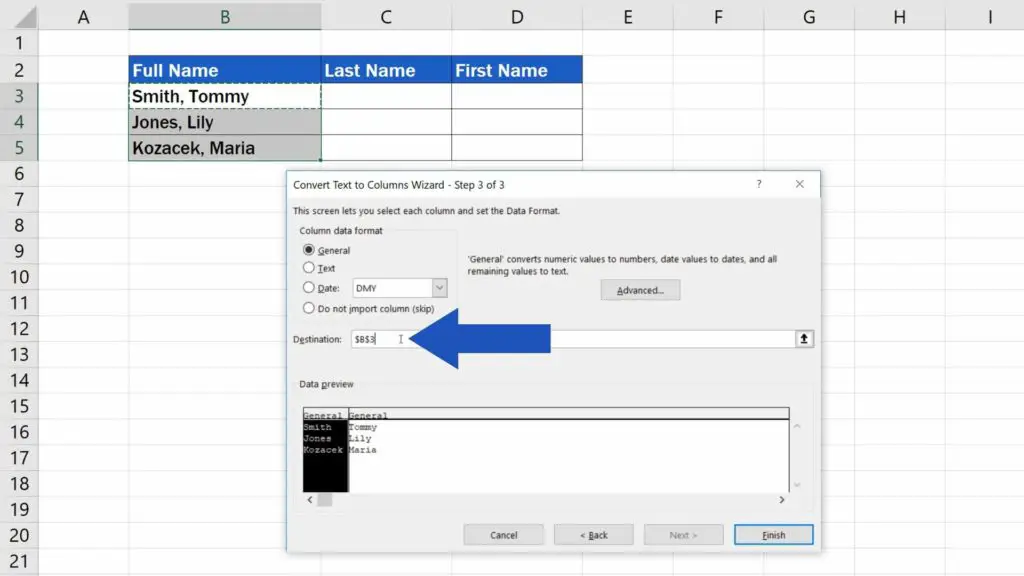
Since we want to keep the original data, we’ll specify the cell C3 to be the location where Excel should start placing the separated names.
So, delete the default location and click on cell C3.

Now click on ‘Finish’, then OK and we’re done!

Remember that these steps can be used with lists of any length, which makes separating names a piece of cake now!
Alternatively, if you want to separate names in Excel, you can use the opposite of the concatenation function covered by Spreadsheet Daddy to achieve the same outcome, only with a lot more flexibility and customization options.
Are you interested in:
If you found this tutorial helpful, give us a Like and watch other video tutorials by EasyClick Academy. Learn how to use Excel in a quick and easy way!
Is this your first time on EasyClick? We’ll be more than happy to welcome you in our online community. Hit that Subscribe button on our YouTube channel and join the EasyClickers!
See you in the next tutorial!

 How to Subtract a Percentage in Excel
Welcome! Today we’re going to talk about the simplest way how to…


