How to Highlight Every Other Row in Excel (Quick and Easy)
Today we’re gonna have a look at how to highlight every other row in Excel, quick and easy, no matter the size of the data table.
Ready to start?
Would you rather watch this tutorial? Click the play button below!
How to Highlight Every Other Row in Excel
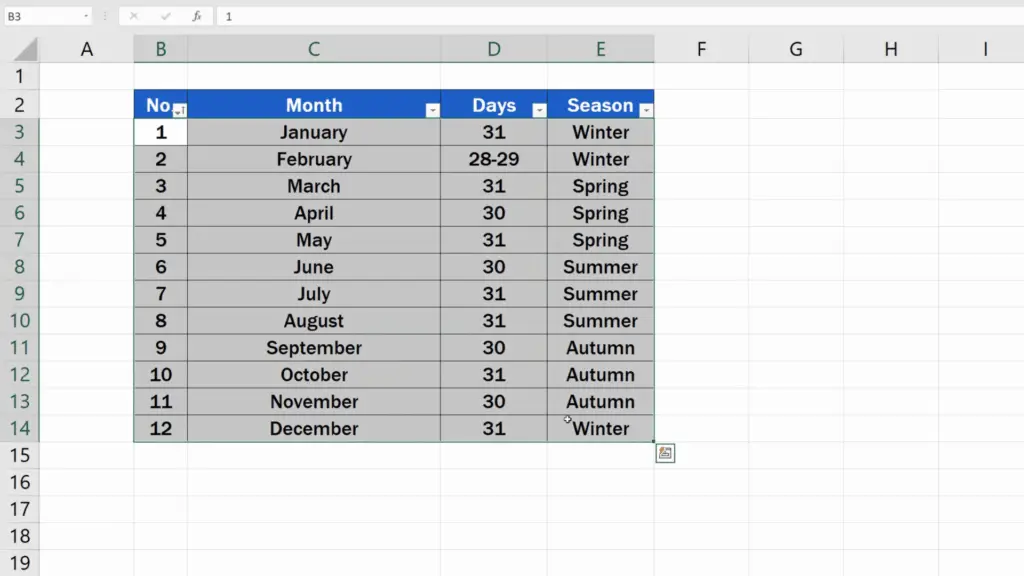
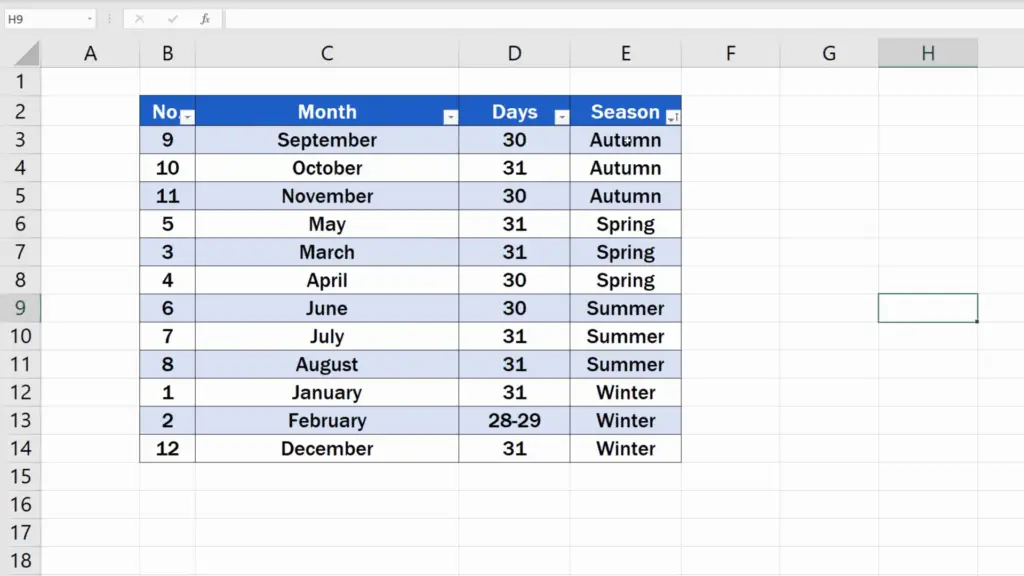
To highlight every other row in an Excel table, we need to select the applicable area first.
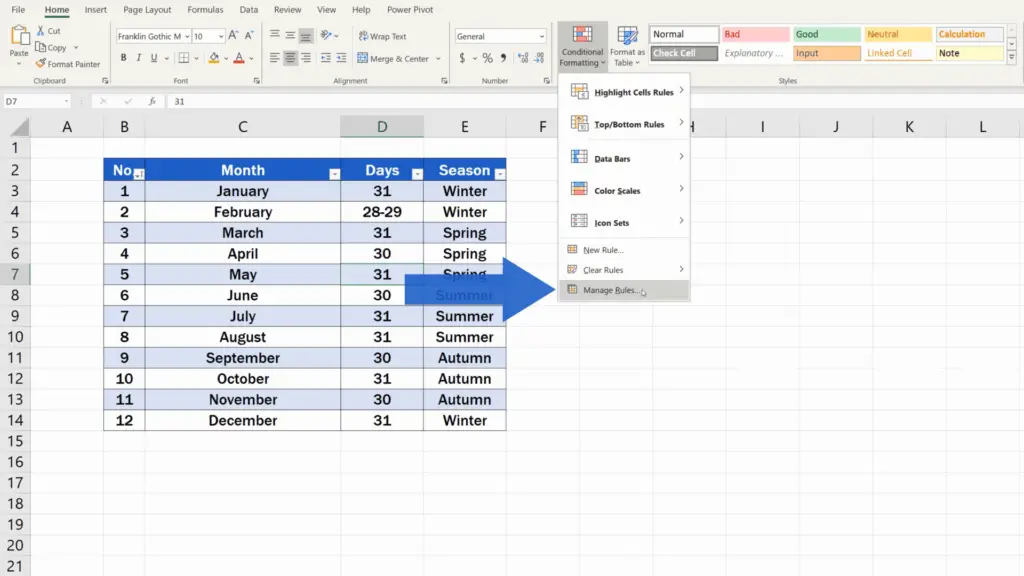
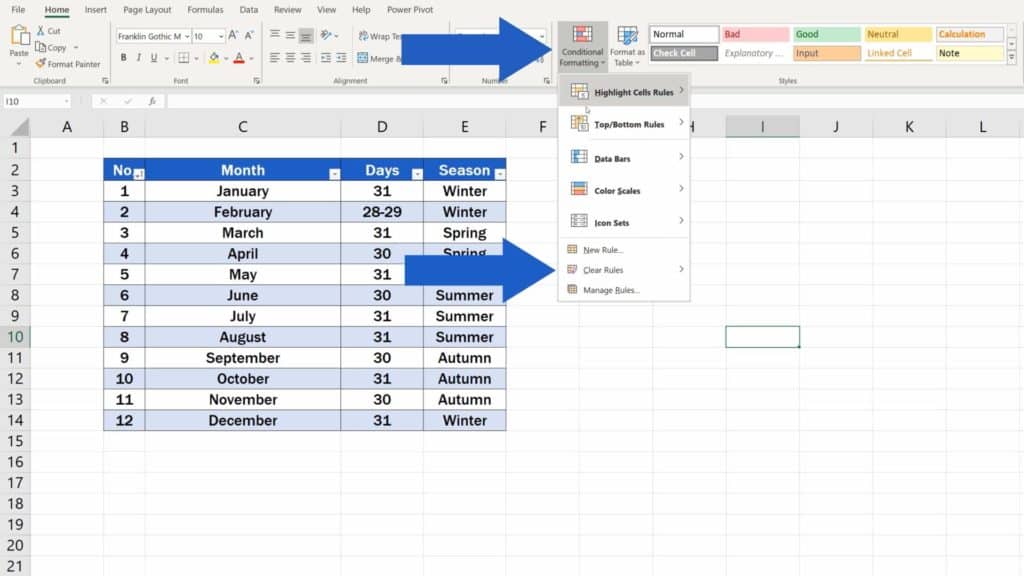
Then in the Home tab, we select ‘Conditional Formatting’ and click on the option ‘New Rule’.

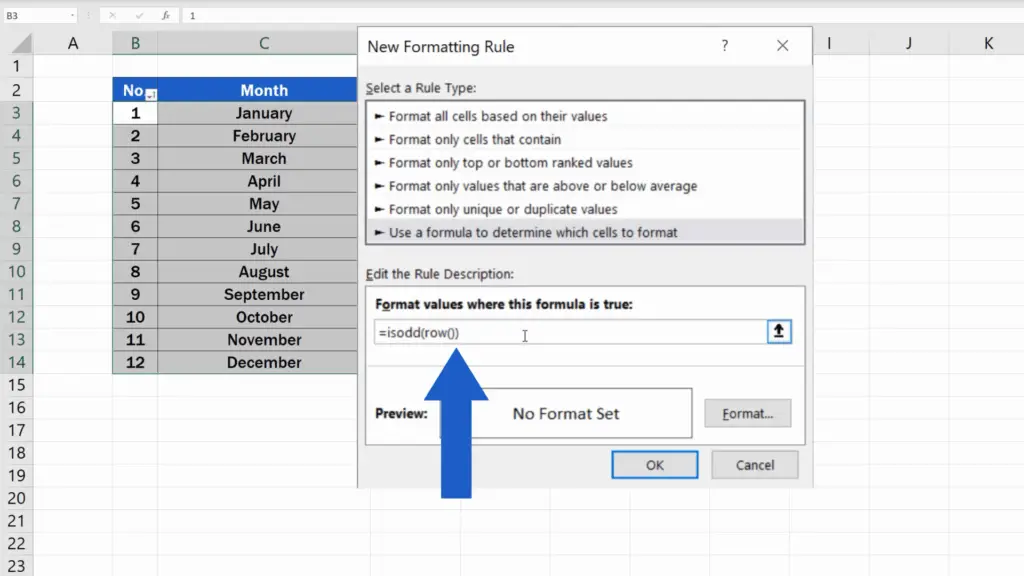
A window appears where we need to click on ‘Use a formula to determine which cells to format’.

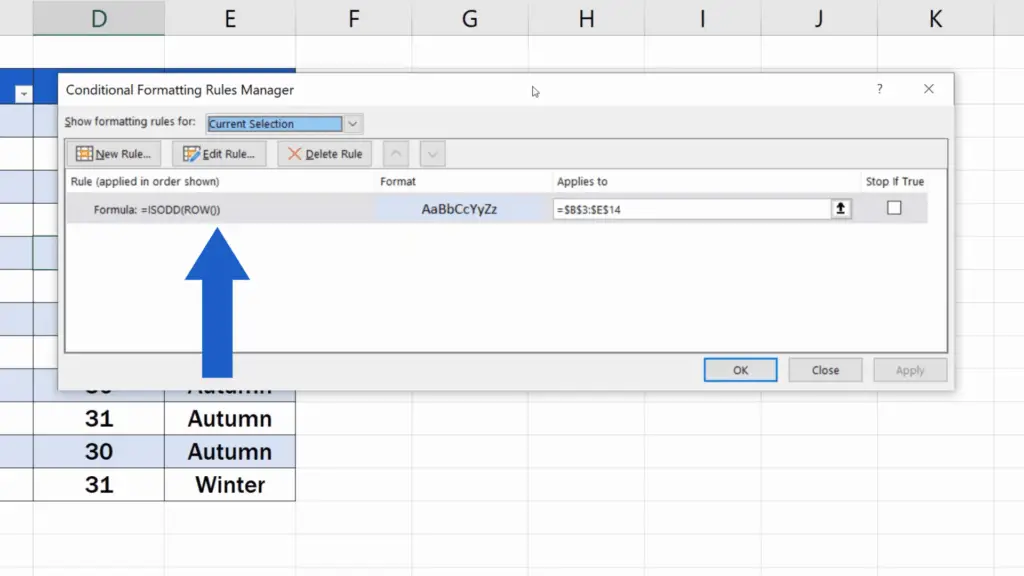
Now, to highlight all the odd rows (rows 3, 5, 7, and so on), start typing the equal sign and then the formula ‘ISODD’. We want to highlight rows, so we carry on with an opening bracket, type in ‘ROW’, then we insert empty brackets and the closing bracket right after that. This is the whole formula to highlight every odd row. We included this formula in the list below, so you’ll have it at hand any time you need.
- =isodd(row())
How to Format Highlighted Rows
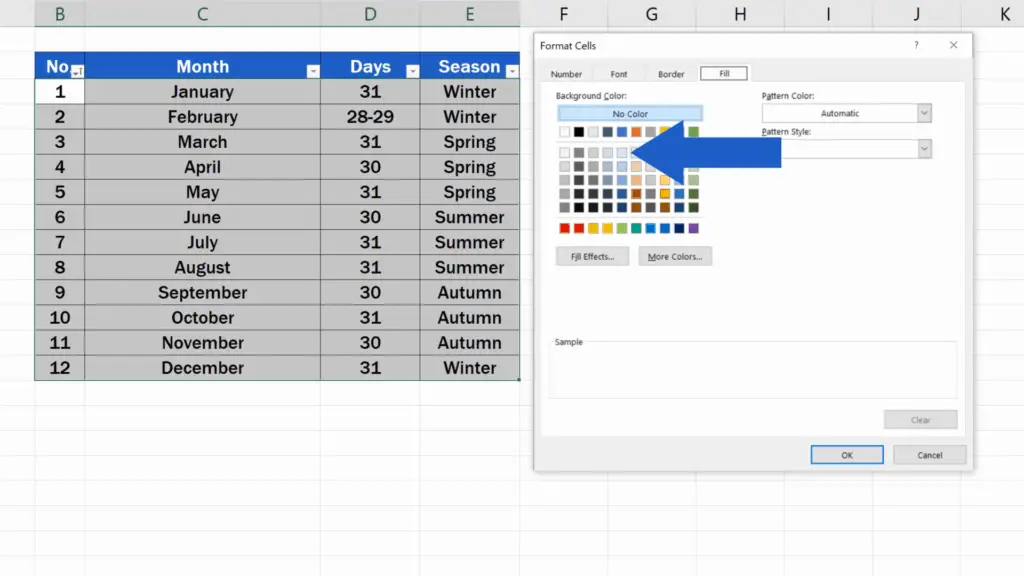
Now we need to specify how we want to highlight the rows. So, click on ‘Format’ and you’ll see all the possible formatting options for these rows.

We just want to highlight rows, so we’ll go to the tab ‘Fill’ and choose, for example, this light blue. Of course, you can go for any colour you want – you’re not limited in your choice.
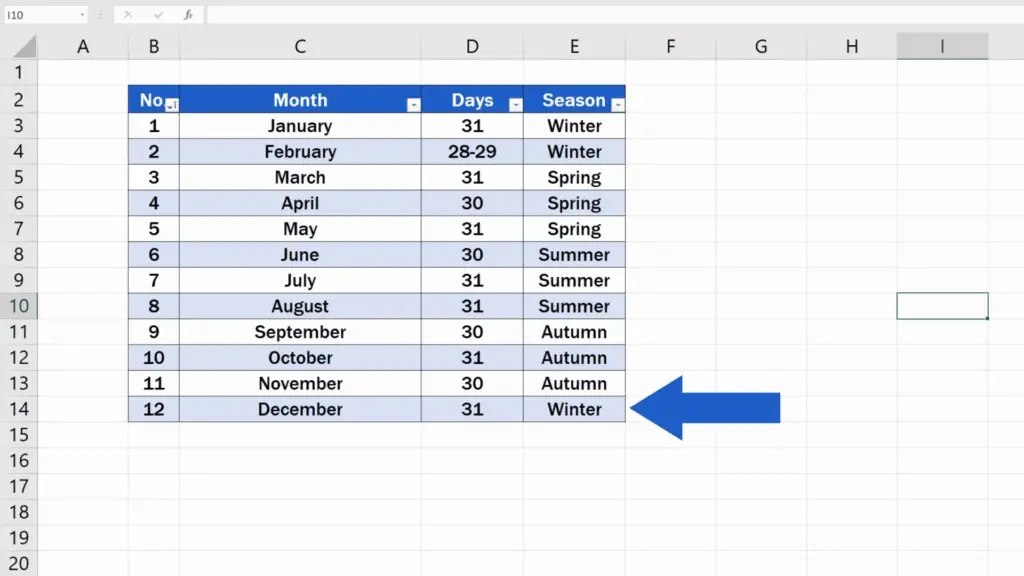
As soon as everything’s been set, we can click on OK twice and see the result! Every other row in the table has been highlighted according to the used settings.
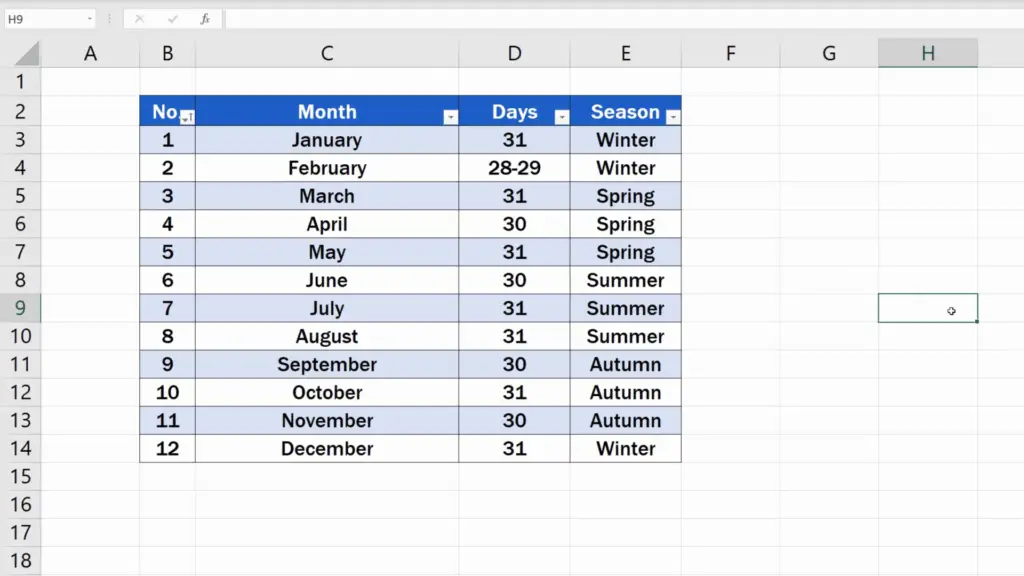
Highlighting rows through conditional formatting is great in a way that if you use the filter to reorganise the data in the table, every other row still remains highlighted. The highlighting does not move with the data and the table stays visually neat and clear.
But what if we need to highlight every even row? That’s actually a cinch to do now.
Here’s how.
How to Highlight the Even Rows
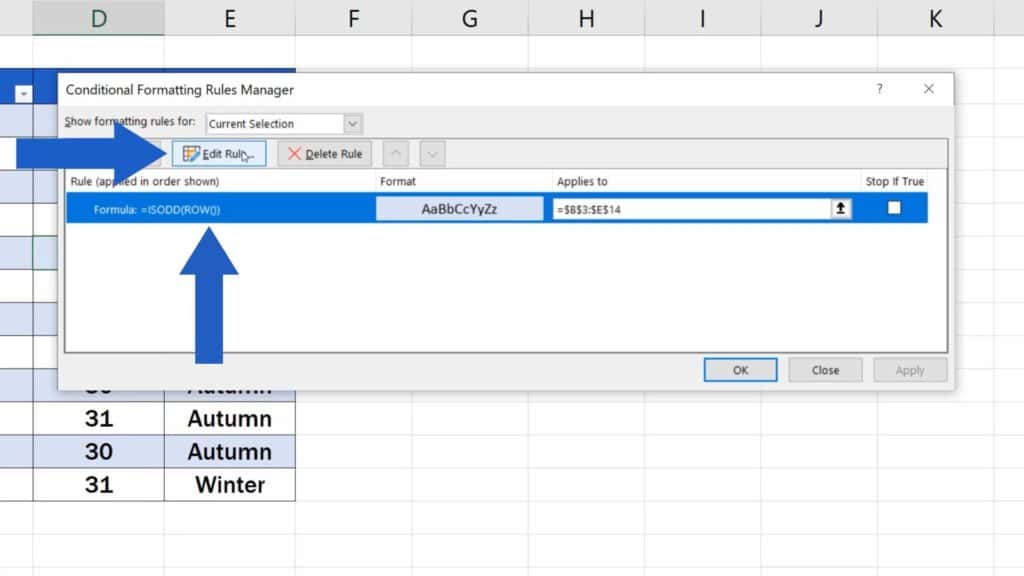
Click anywhere into the data table, go to ‘Conditional Formatting’ and select ‘Manage Rules’. You can see the rule we’re using right now – the rule to highlight every odd row.
So now, when we want to highlight the even rows, which are rows 4, 6, 8, and so on, we click on the rule and then click on the button ‘Edit Rule’. Then we simply overwrite ‘ODD’ with ‘EVEN’ in the formula.

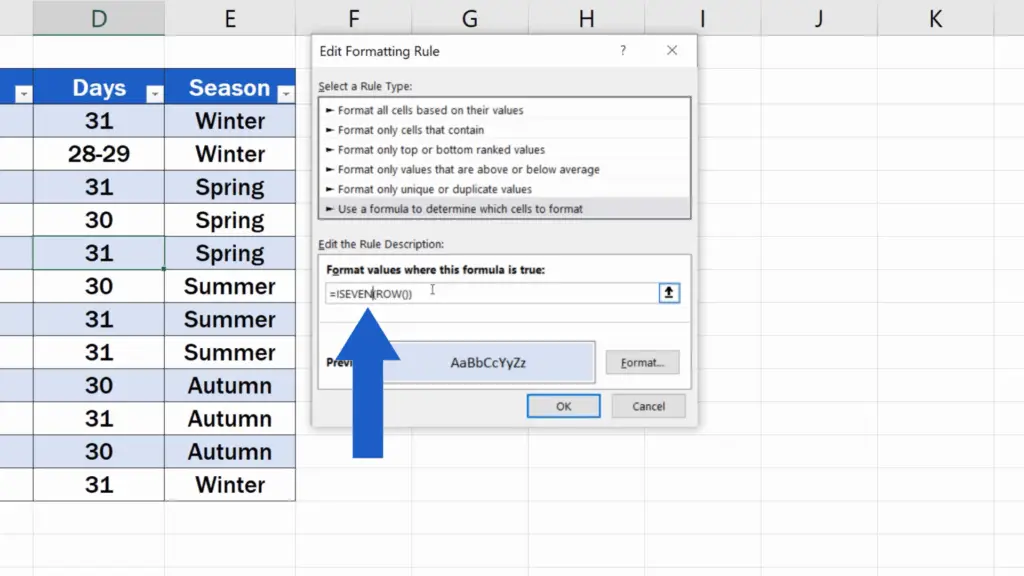
The rest of the formula remains as is. Again, click on OK and then OK one more time, and that’s all it takes! Each even row in the table has now been highlighted.
There’s one more thing worth mentioning before we wrap it up for today.
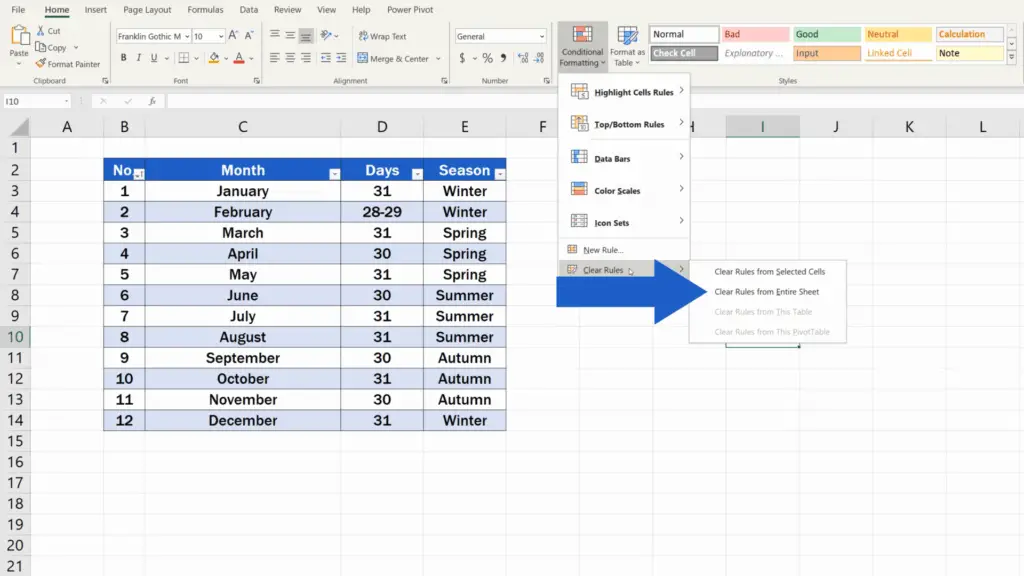
How to Remove the Formatting From the Table
To remove the formatting from the table, click on ‘Conditional Formatting’, then go to ‘Clear Rules’ and select ‘Clear Rules from Entire Sheet’, which will remove the highlighting in no time at all.
Don’t miss out a great opportunity to learn:
- How to Create Filter in Excel
- How to Use Color Scales in Excel (Conditional Formatting)
- How to Highlight Blank Cells in Excel (Conditional Formatting)
If you found this tutorial helpful, give us a like and watch other tutorials by EasyClick Academy. Learn how to use Excel in a quick and easy way!
Is this your first time on EasyClick? We’ll be more than happy to welcome you in our online community. Hit that Subscribe button and join the EasyClickers!
Thanks for watching and I’ll see you in the next tutorial!

 How to Subtract a Percentage in Excel
Welcome! Today we’re going to talk about the simplest way how to…


